

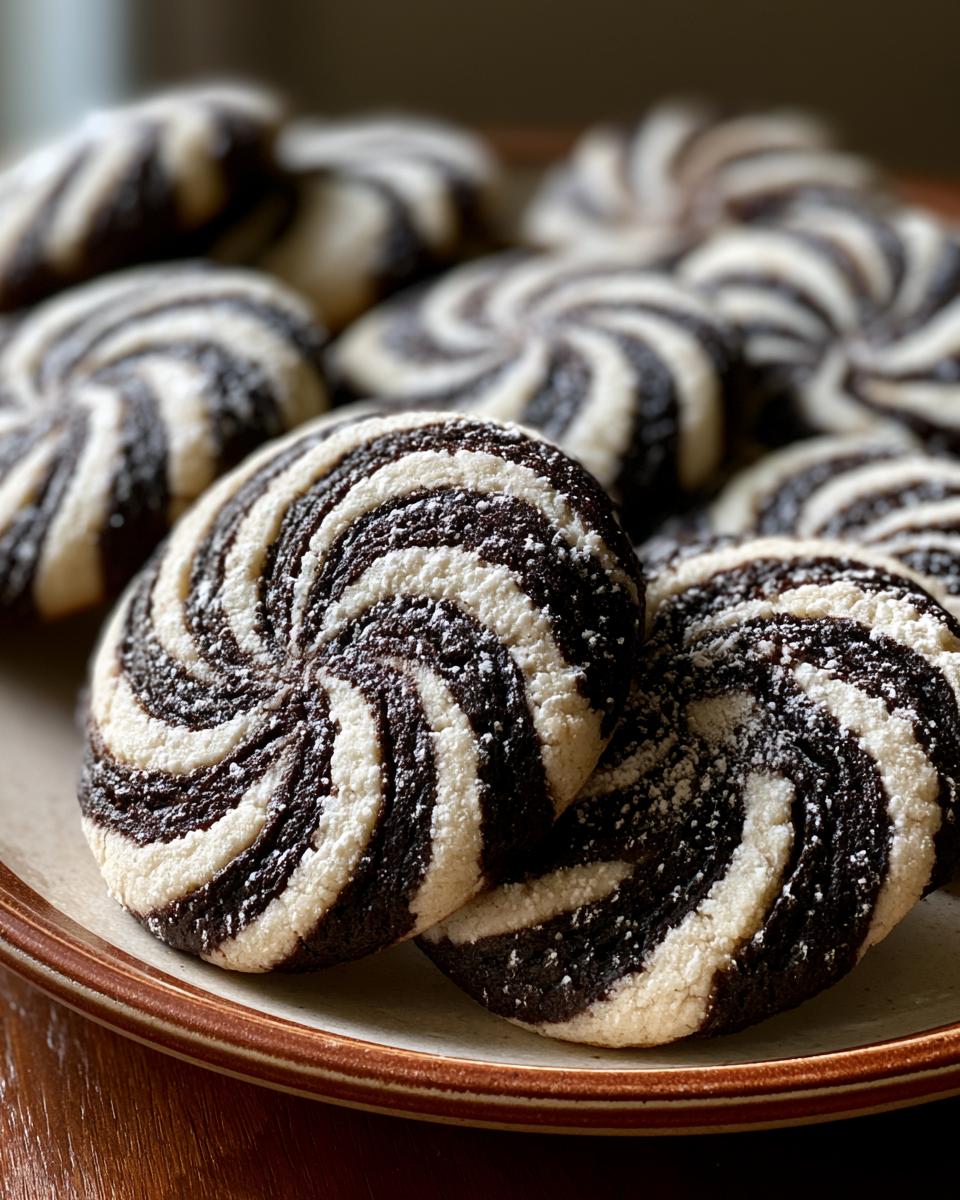
The first time I saw Zebra Cookies, I honestly thought someone had Photoshopped them. But no – those perfect chocolate and vanilla swirls are real, and they come from a ridiculously simple technique. I made my first batch for my daughter’s school bake sale, and let me tell you, they disappeared faster than anything else on the table. One mom actually asked if I’d bought them from a fancy bakery, which gave me a little too much pride.
What I love most about these Zebra Cookies is how they look way more impressive than they actually are. You’re working with super basic pantry ingredients – butter, sugar, flour, cocoa powder – and yet the finished cookies look like something from a professional patisserie. And the swirl technique? It’s practically foolproof. No special tools, no complicated piping. Just a simple roll, a chill, and a slice. That’s it.
Why You’ll Love These Zebra Cookies
- You only need basic pantry staples to make them – butter, sugar, flour, eggs, and cocoa powder – so you can whip up a batch anytime without a special trip to the store.
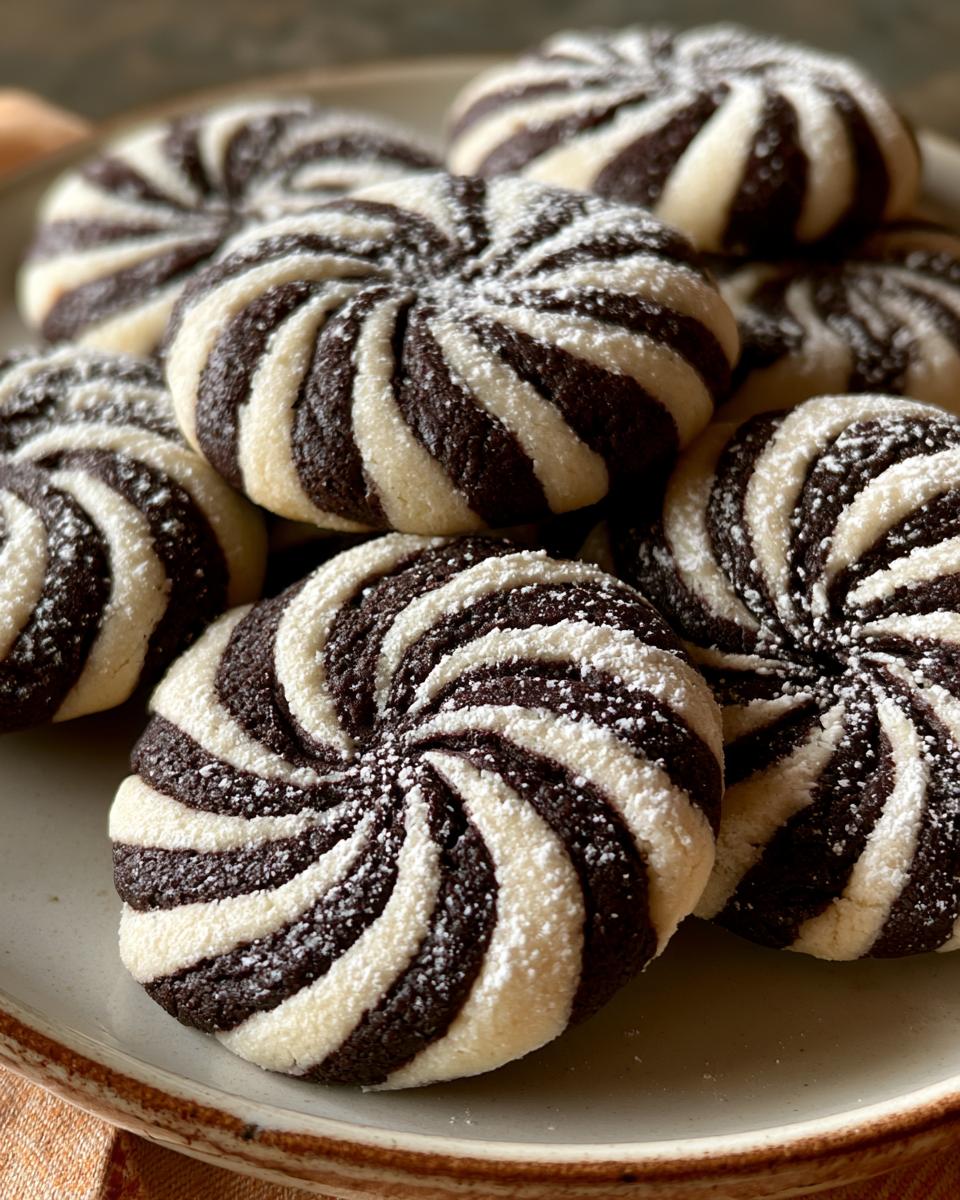
- The chocolate-vanilla swirl is genuinely stunning, and I’ve tested the chilling time over and over to make sure those stripes come out clean and sharp every single time.
- They’re a fantastic baking project to do with kids because the rolling and slicing feels like a fun craft, and they get so excited watching the pattern appear.
- These cookies keep beautifully for days in an airtight container, which makes them perfect for gifting during the holidays or bringing to a cookie swap.
Ingredients for Zebra Cookies
- 1 cup butter, softened
- 1 1/2 cups granulated sugar
- 2 large eggs
- 1 teaspoon vanilla extract
- 2 1/2 cups all-purpose flour
- 1 teaspoon baking soda
- 1/2 teaspoon salt
- 1/4 cup unsweetened cocoa powder
How to Make Zebra Cookies Step by Step
Step 1: Cream together the softened butter and granulated sugar until it’s light and fluffy. This is the secret to a tender cookie – if you rush it, the texture will be off. I use my stand mixer with the paddle attachment and let it go for a good 2-3 minutes until it looks pale and airy.
Step 2: Beat in the eggs one at a time, making sure the first is fully incorporated before you add the second. Then stir in the vanilla extract. Don’t skip this – vanilla really makes the flavor pop in the finished cookies.
Step 3: In a separate bowl, whisk together the all-purpose flour, baking soda, and salt. I always do this step separately because it guarantees everything’s evenly distributed without overmixing the dough.
Step 4: Gradually add the dry ingredients to the wet mixture, mixing until just combined. Stop as soon as you don’t see any more flour streaks. Overmixing here will make your cookies tough, and nobody wants that.
Step 5: Divide your dough in half. Take one half and mix in the unsweetened cocoa powder until it’s completely incorporated and you can’t see any light spots. This is your chocolate half.
Step 6: Roll each half of dough out on a floured surface or between two sheets of parchment paper into a rectangle about 10×12 inches. Make sure they’re roughly the same thickness so the swirls come out even.
Step 7: Now for the fun part. Place the vanilla rectangle straight on top of the chocolate rectangle. Don’t press down – just lay it gently.
Step 8: Roll the stacked layers up tightly, starting from one of the short ends, just like you would a jelly roll. Keep it as snug as you can without squeezing the dough out the sides.
Step 9: Wrap the entire dough log in plastic wrap and chill it for at least 1 hour. This is absolutely non-negotiable. If you skip this, the stripes will blur when you slice them, and you’ll lose the whole zebra effect.
Step 10: Preheat your oven to 350°F. While that’s heating, line your baking sheets with parchment paper so the cookies don’t stick and the bottoms brown evenly.
Step 11: Take your chilled dough log out of the fridge and slice it into 1/4-inch thick rounds. Use a sharp knife and go in one clean motion – sawing back and forth will mess up the stripes.
Step 12: Place the slices on your prepared baking sheets, leaving about 2 inches between each cookie. They do spread a little, so give them space.
Step 13: Bake for 8-10 minutes, until the edges are just barely golden. The centers might still look a tiny bit soft, but they’ll set as they cool.
Step 14: Let the cookies rest on the baking sheet for a few minutes before you transfer them to a wire rack to cool completely. Pro tip: if you want those stripes to be even sharper and more defined, just chill the dough for an extra 30-60 minutes before slicing. The longer chill really locks in the pattern.
What to Serve with Zebra Cookies
Zebra Cookies with Cold Milk
A tall glass of icy cold milk is my go‑to with these cookies. The milk cuts through the sweetness perfectly and really brings out that deep cocoa flavor. My kids absolutely love dunking them – the stripes stay intact, and they giggle watching the swirls disappear.
Zebra Cookies à la Mode
For a next‑level dessert, serve a warm cookie right out of the oven with a scoop of vanilla ice cream. The hot‑cold contrast is fantastic, and it actually echoes the zebra pattern – creamy vanilla next to dark chocolate. Pure indulgence.
Coffee
If you’re looking for an adult twist, pair these cookies with a strong black coffee or a double espresso. The bitterness of the coffee balances the sweet chocolate‑vanilla swirls beautifully. It’s my favorite afternoon pick‑me‑up when I need a tiny treat.
Storing and Reheating Zebra Cookies
Store your zebra cookies in an airtight container at room temperature, and they’ll stay fresh for up to 5 days. If you want them to last even longer, pop them in the fridge where they’ll be good for a couple of weeks. I usually keep a batch on the counter for everyday snacking and stash the rest in the fridge for later.
When you’re ready to enjoy them again, reheat in a 300°F oven for about 5 minutes to bring back that just-baked texture, or microwave for 10 seconds if you’re in a hurry. For meal prep, freeze unbaked sliced dough between layers of parchment paper – you can pop the frozen slices straight into the oven, just add 2 minutes to the bake time. It’s a lifesaver when unexpected company shows up or when you want fresh cookies in minutes.
Frequently Asked Questions About Zebra Cookies
Can You Freeze Zebra Cookies Dough?
Absolutely. Just wrap the log tightly in plastic wrap, then a layer of foil, and pop it in the freezer for up to 3 months. When you’re ready, slice it straight from frozen and bake as directed, just add an extra 1-2 minutes. This is my go-to for prepping a batch ahead of holiday parties.
Why Are My Zebra Cookies Not Swirling?
If the swirls look muddy or you can’t see the chocolate vanilla stripes clearly, it’s usually because the dough wasn’t chilled long enough. Trust me on this – give it at least a full hour, and don’t roll the stacked rectangles too tightly or overwork them. A gentle, confident roll keeps the pattern crisp and defined.
What If the Dough Cracks When Slicing?
Let the log sit at room temperature for just 5-10 minutes after chilling. That slight softening on the outside prevents cracking, and the inside stays firm enough to hold the zebra stripes. Also, use a sharp, thin knife and make one clean cut – no sawing motions, or you’ll lose those beautiful swirled cookies.
Print
Zebra Cookies
- Total Time: 30 min
- Yield: 3 dozen
- Diet: Vegetarian
Description
Simple zebra cookies with a chocolate and vanilla swirl.
Ingredients
- 1 cup butter, softened
- 1 1/2 cups granulated sugar
- 2 large eggs
- 1 teaspoon vanilla extract
- 2 1/2 cups all-purpose flour
- 1 teaspoon baking soda
- 1/2 teaspoon salt
- 1/4 cup unsweetened cocoa powder
Instructions
- Cream together butter and sugar until light and fluffy.
- Beat in eggs one at a time, then stir in vanilla extract.
- In a separate bowl, whisk together flour, baking soda, and salt.
- Gradually add dry ingredients to wet ingredients, mixing until just combined.
- Divide dough in half. Mix cocoa powder into one half until evenly distributed.
- Roll each half of dough into a rectangle.
- Stack the vanilla rectangle on top of the chocolate rectangle.
- Roll up the stacked dough tightly, like a jelly roll.
- Wrap the dough log in plastic wrap and chill for at least 1 hour.
- Preheat oven to 350°F (175°C). Line baking sheets with parchment paper.
- Slice the chilled dough log into 1/4-inch thick rounds.
- Place cookies on prepared baking sheets.
- Bake for 8-10 minutes, or until edges are lightly golden.
- Let cool on baking sheets for a few minutes before transferring to a wire rack to cool completely.
Notes
- For sharper stripes, chill the dough for longer.
- You can dust with powdered sugar before serving.
- Prep Time: 20 min
- Cook Time: 10 min
- Category: Dessert
- Method: Baking
- Cuisine: American